All lessons · 44
How to Create and Host a Website for Free
Generate a website with ChatGPT and publish it on GitHub Pages in about 15 minutes. All free, no coding experience needed.
What you’ll end up with
A real website on the internet with your own address — for example,
https://your_login.github.io.
Try it right here — edit the code and see the result immediately:
What you’ll need
- A ChatGPT account — chat.openai.com (the free plan is enough)
- A GitHub account — github.com
- ~15 minutes of time
Nothing else. Everything runs right in your browser — no payment needed.
Three words you’ll meet below, in plain language:
- Repository — a project folder on GitHub. It holds your files and the history of every change to them. That’s all.
- Commit — “save this version”, with a short note saying what changed.
- Deploy — put the saved version online so the world can see it.
Step by step
Find a reference site
Find a website online whose design you like. Copy the link — ChatGPT will build you a site in a similar style, but with your content.
Generate the site in ChatGPT
Sign up for ChatGPT and send the prompt from the template below — substitute your link and your own info:
Prompt for ChatGPTCreate a website similar to [REFERENCE SITE LINK]. But it must be my own working page. Tell about me: [what you do, your experience], my work: [services/projects], contacts: [phone, email, socials], service prices: [your list]. Requirements: everything in a single index.html file (HTML + CSS inside), mobile-friendly, modern design. Give me the COMPLETE file, from the first line to the last — not a snippet.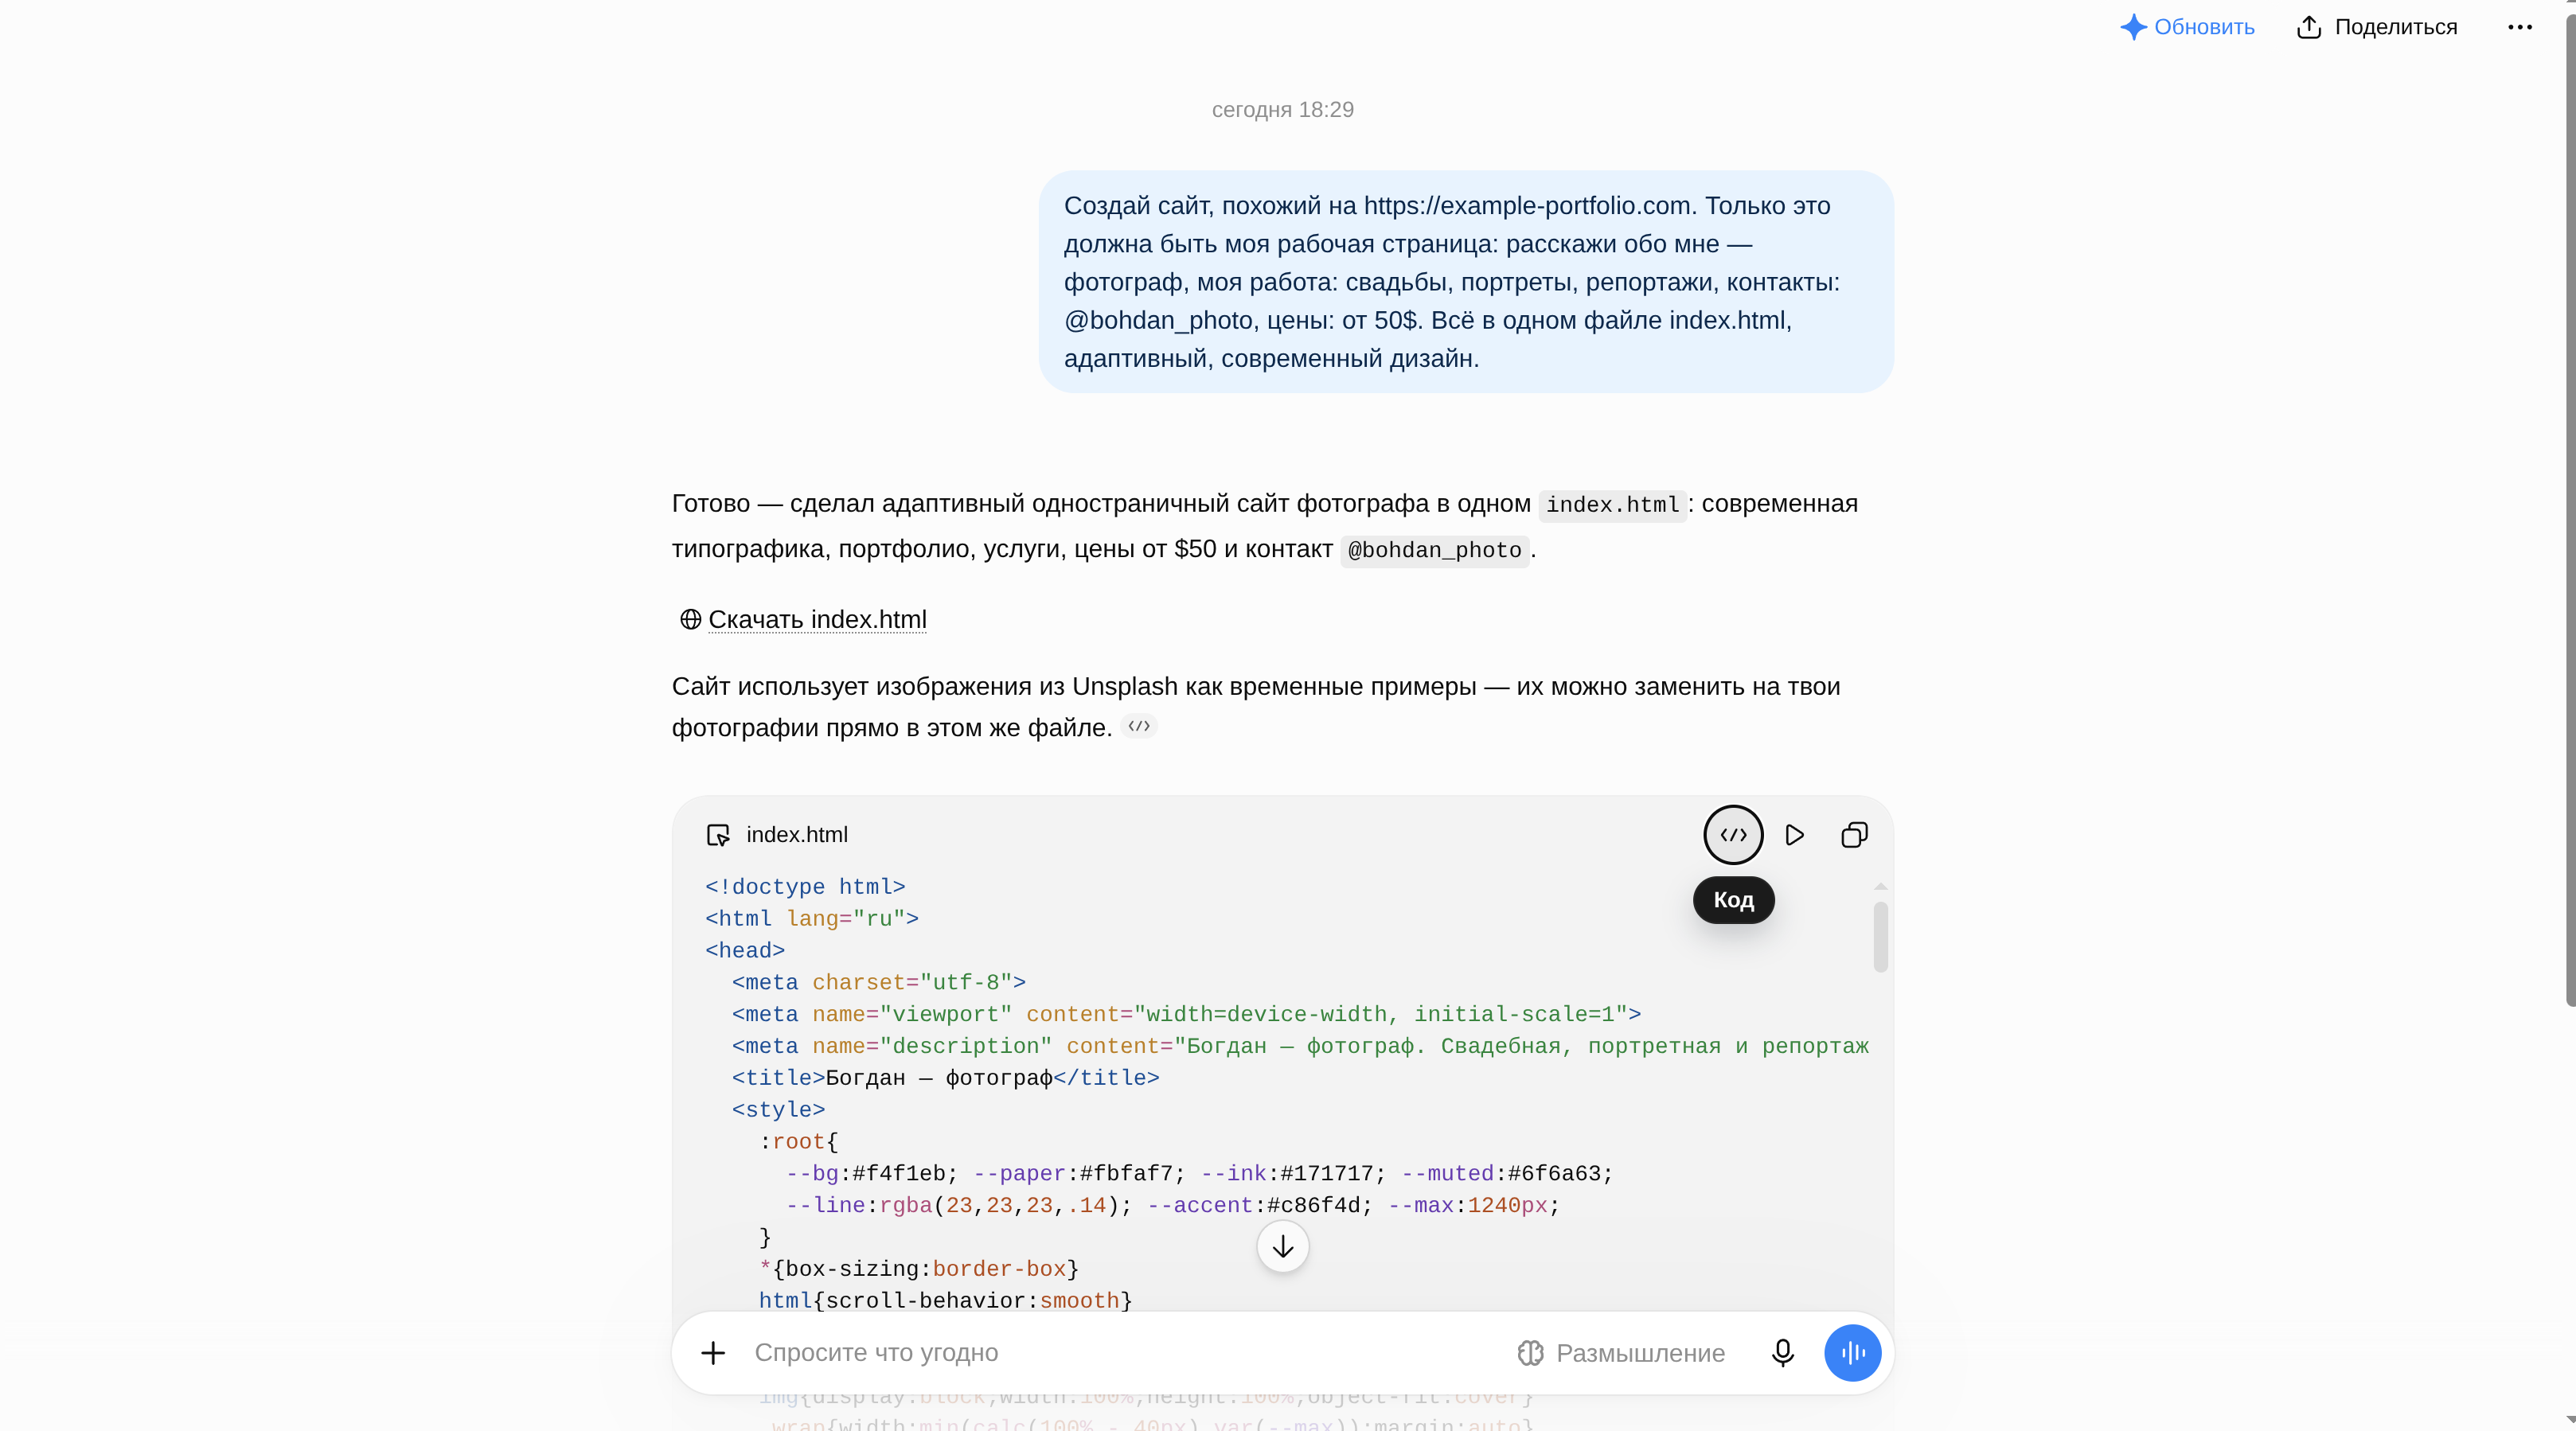
ChatGPT generates the whole site as one file Press Copy on the code block — you’ll need it in step 6.
Ask for the WHOLE file, every time
ChatGPT sometimes answers with a fragment and says “…and so on”. That won’t work — you need every line. If the answer looks cut short, just reply: “give me the complete file, from the first line to the last.”
Sign up for GitHub
Go to github.com and create an account — the Sign up button is in the top right corner of the homepage:
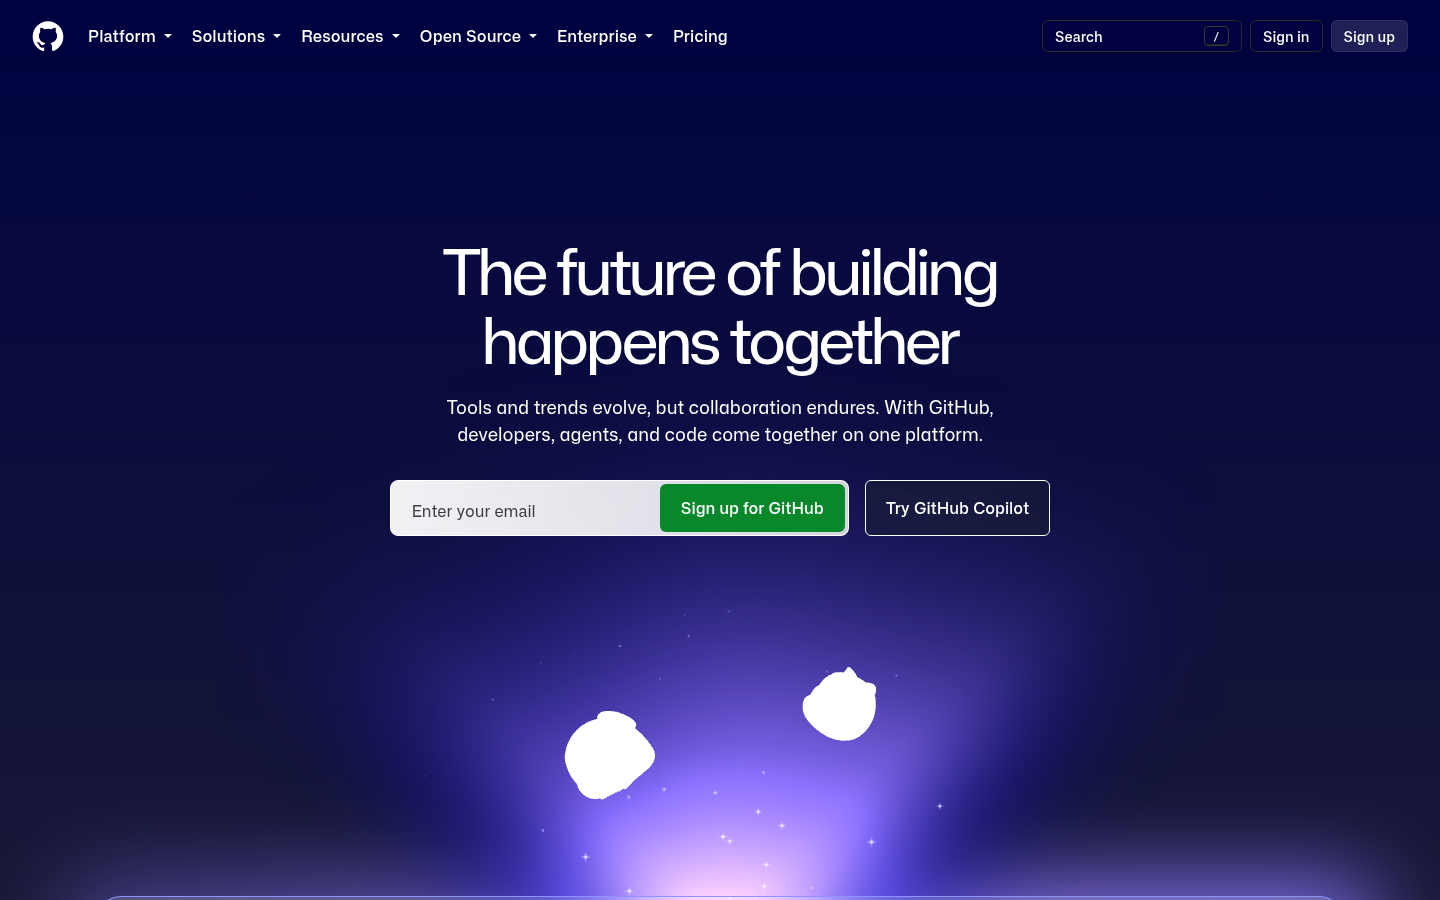
github.com — the Sign up button is in the top right corner GitHub asks for an email, a password and a username. That username becomes part of your site’s address, so pick one you’ll be happy to share. You will also be asked to confirm your email address — do it, or the site may not publish.
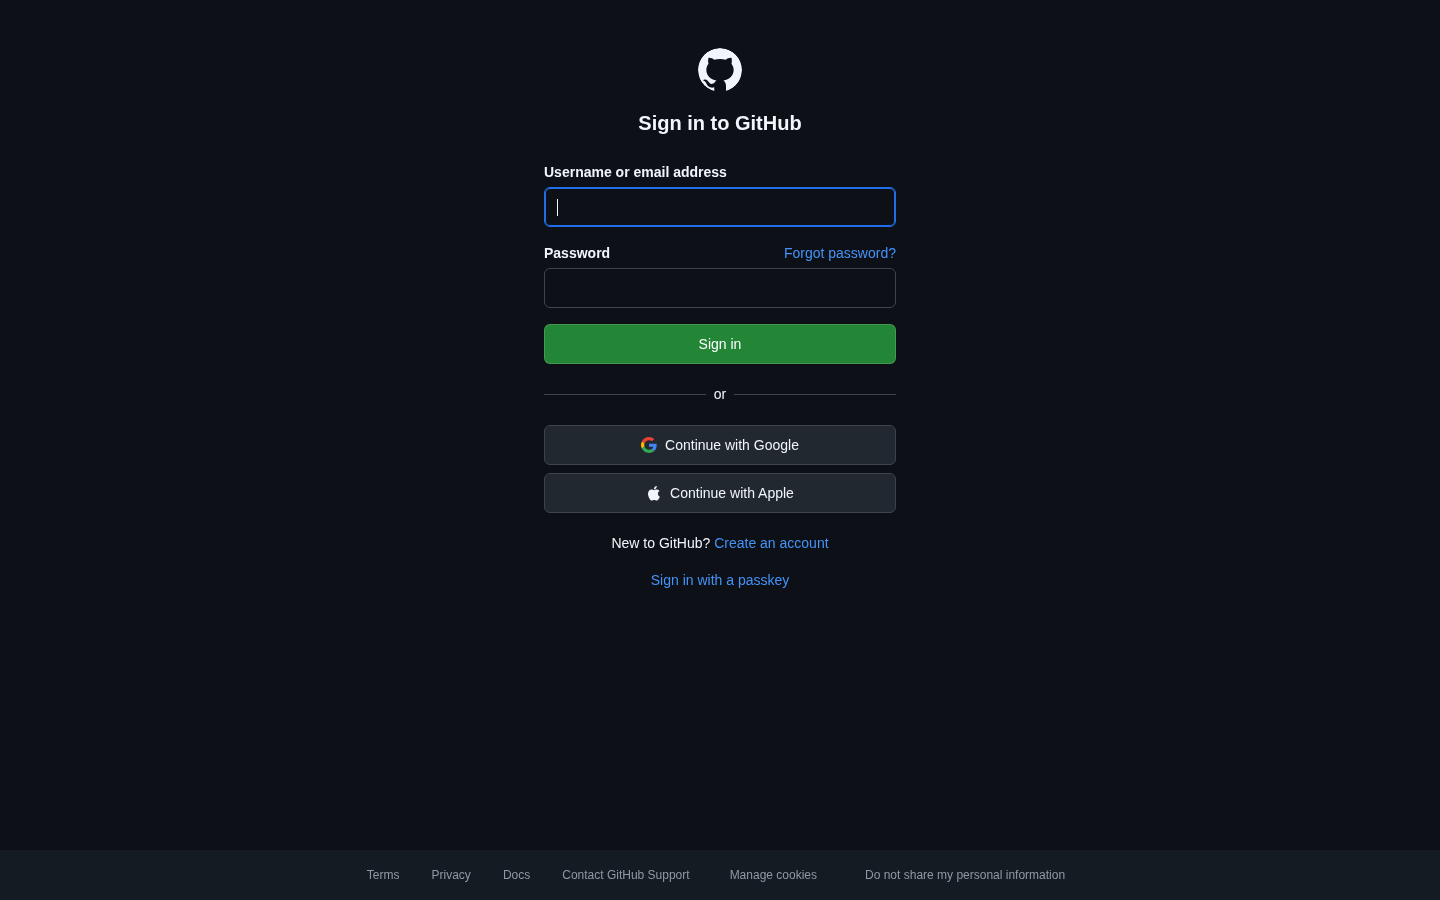
If you land on the sign-in page instead, the “Create an account” link takes you to registration Create a repository
Press the “+” in the top right corner → New repository and name it exactly
your_login.github.io: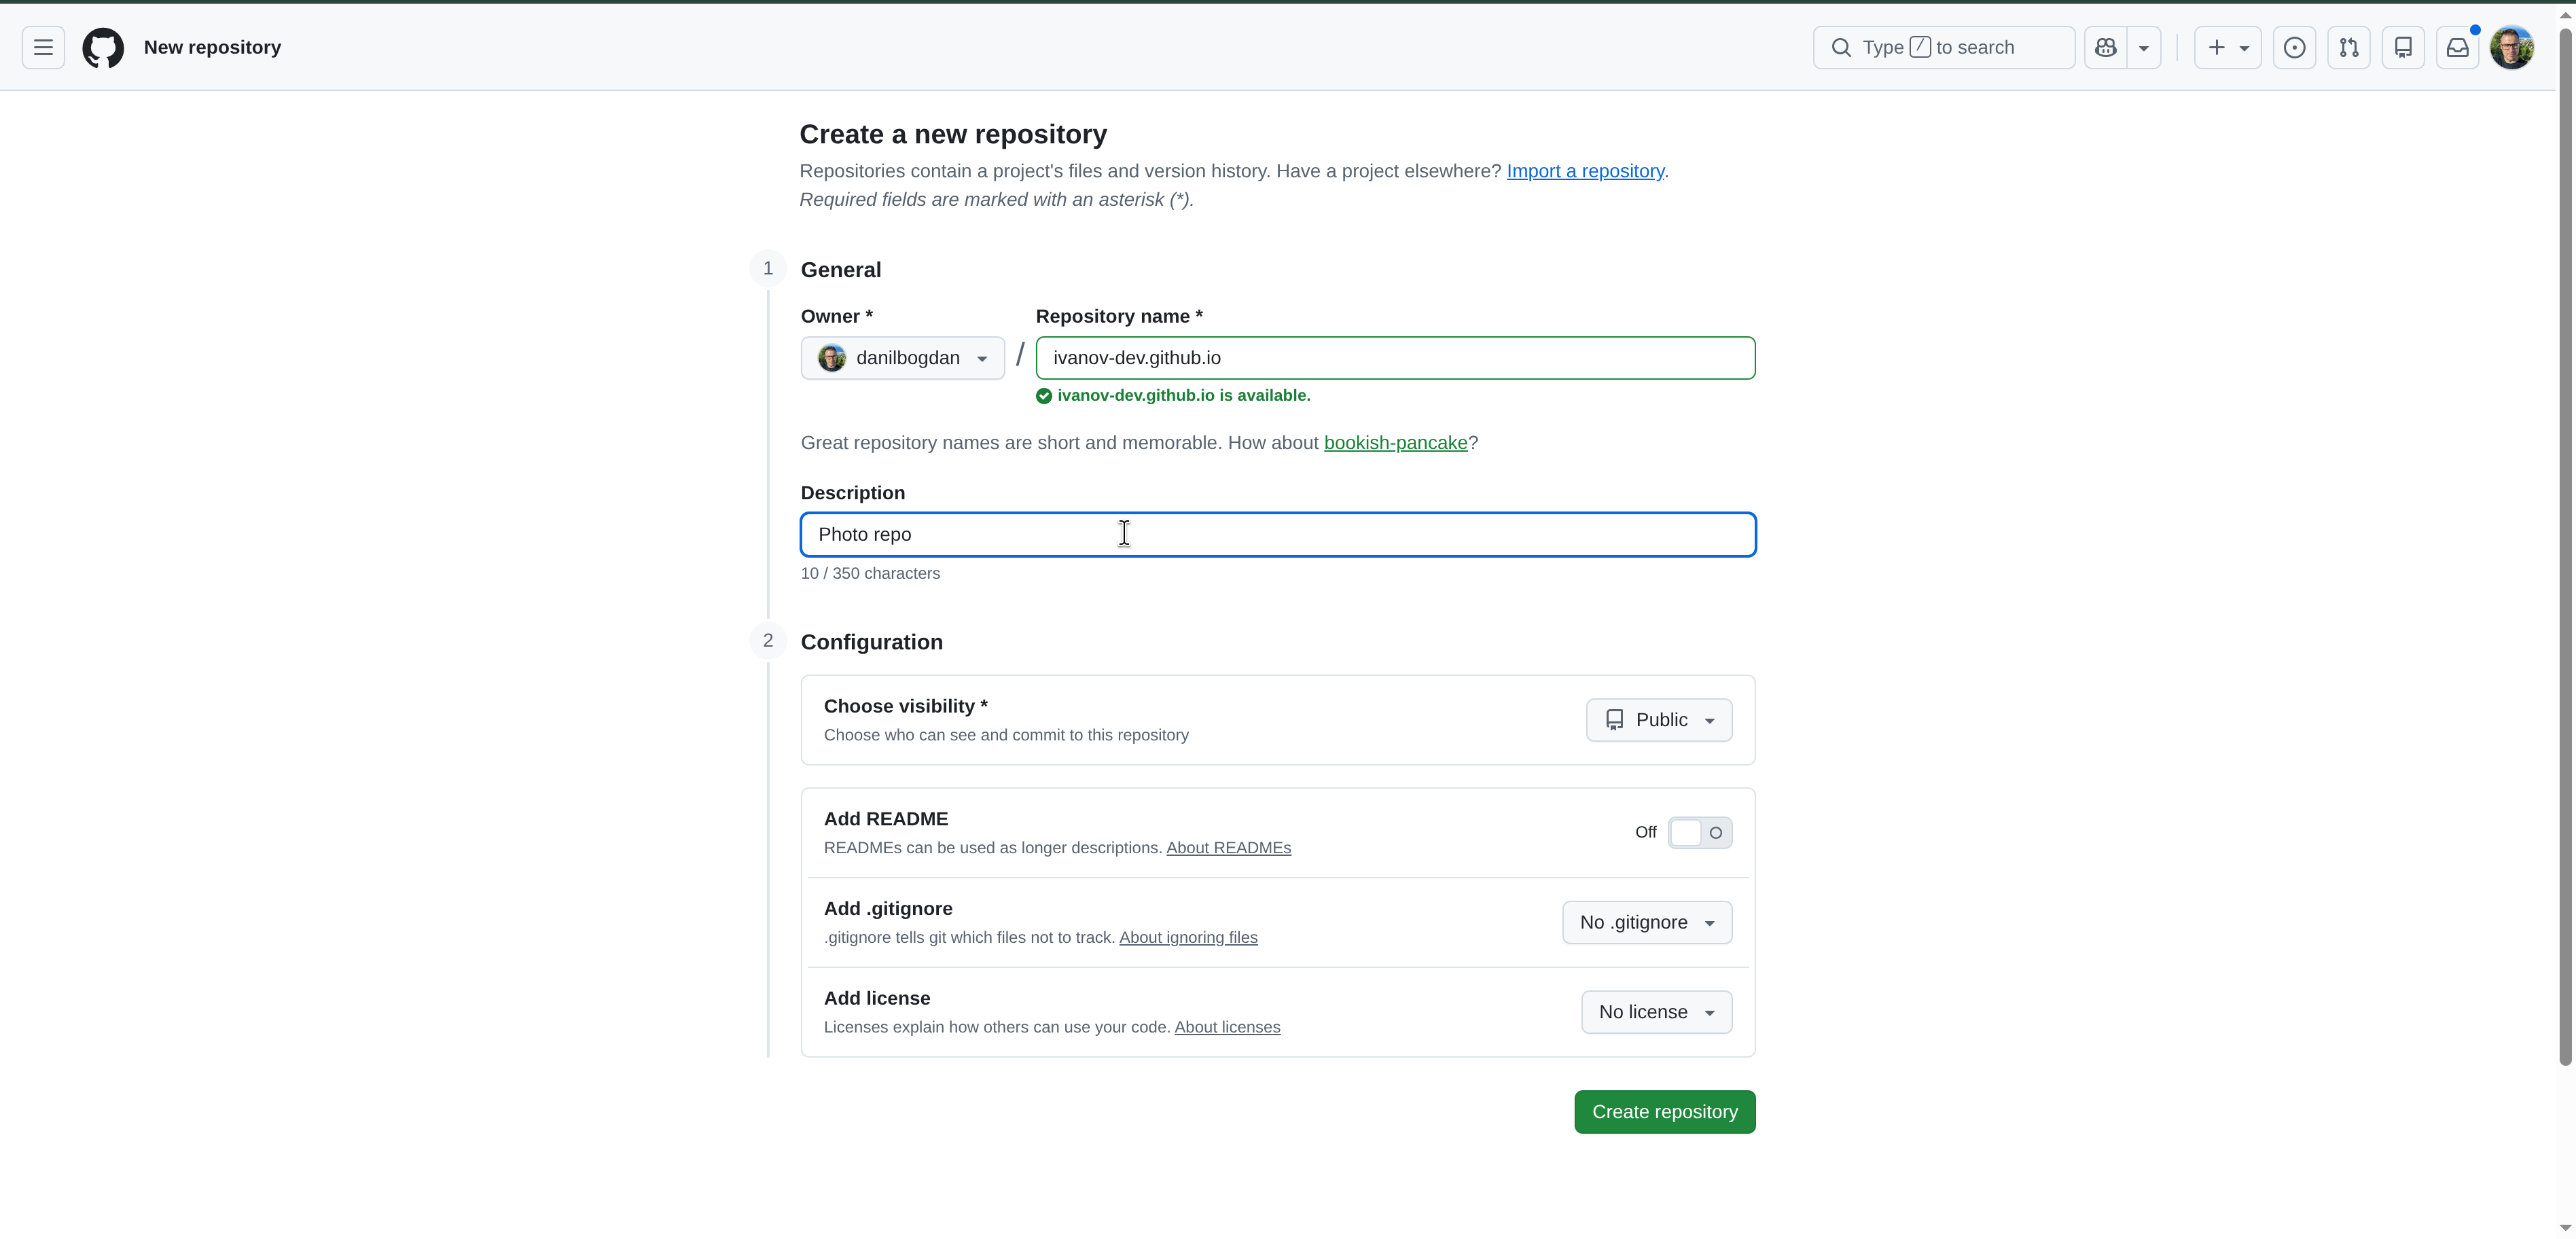
The repository name = the address of your future site The name decides your address
Name the repository
login.github.io— lowercase, no spaces, whereloginis your own GitHub username. Then the site opens athttps://login.github.iowith no extra prefixes. You can rename a repository later, but the address changes with it and old links break — so get it right now.Add a short description, choose Public → Create repository. Public is not optional here: free GitHub Pages only works for public repositories.
Open the code editor
The repository is empty, so press the Create a codespace button right on the page — or use the green Code button → Codespaces → Create codespace on main. An online version of VS Code opens, where you can add, delete and edit files right in your browser.
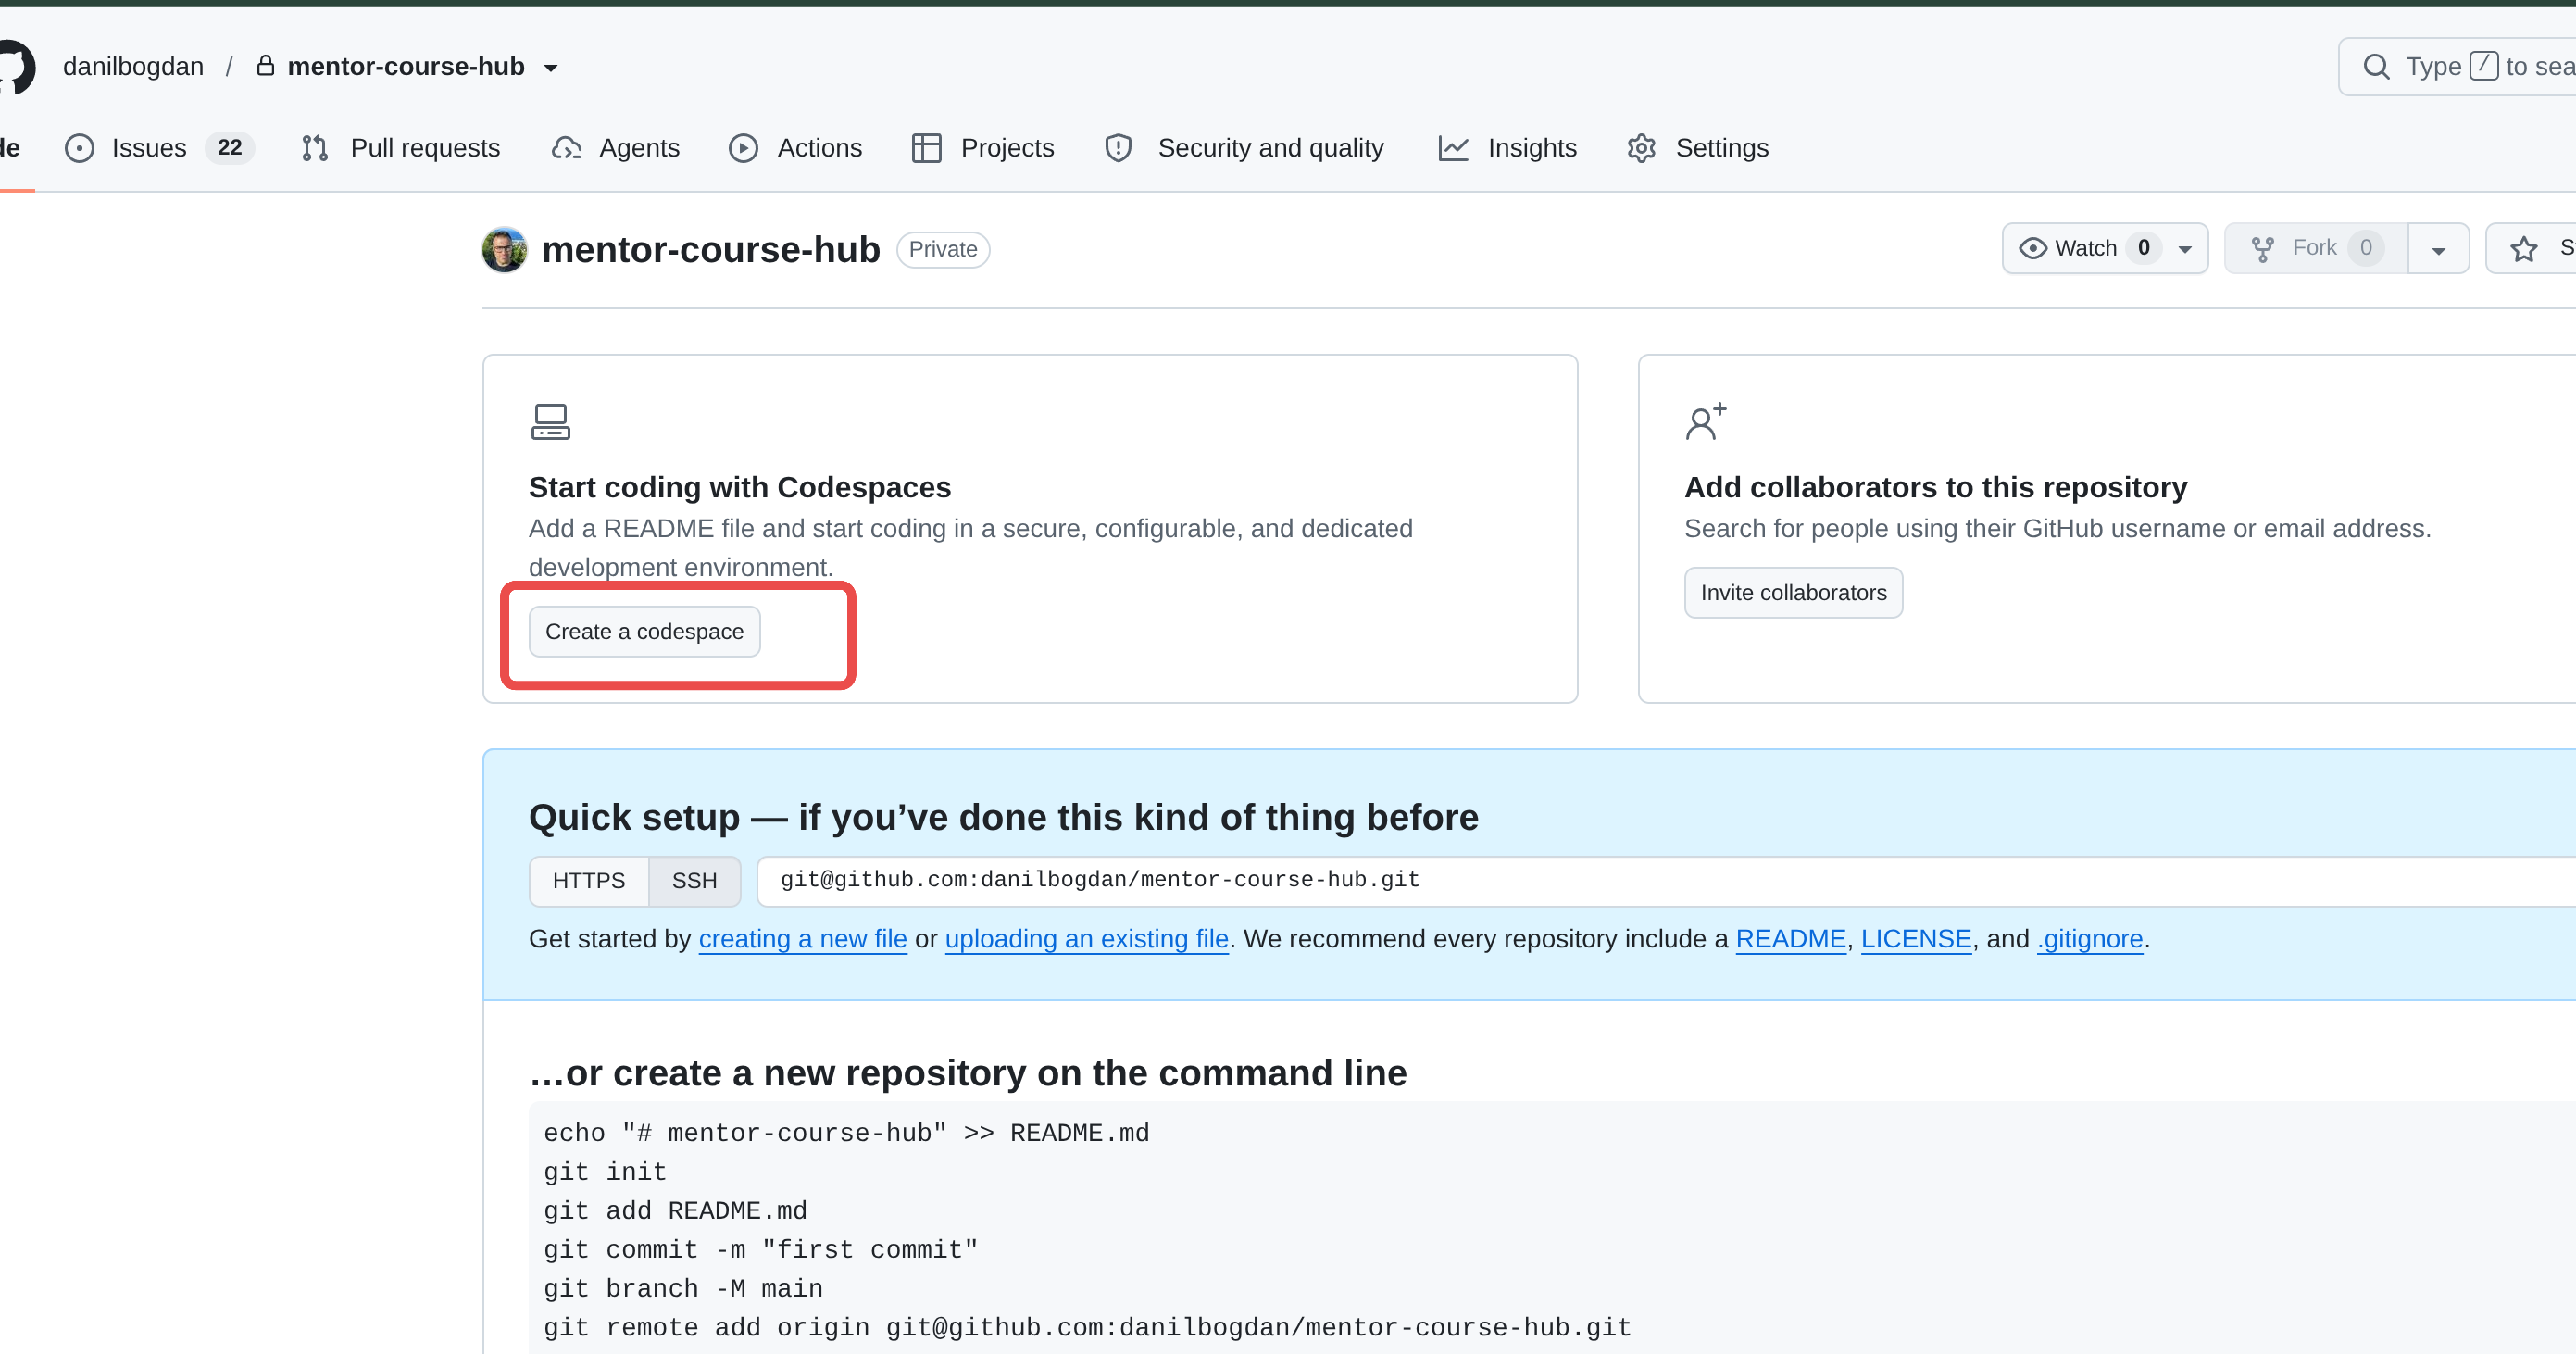
Press Create a codespace — the online editor opens right in your browser Don't want a codespace? There is a shorter path
A codespace is a full online editor — convenient if you’ll keep editing, but it spends your monthly GitHub quota (the free plan includes a generous one, and it renews every month). For a single-page site you can skip it entirely: press Add file → Create new file right on the repository page, type
index.htmlas the file name, paste the code and press Commit changes. Steps 6–7 below describe the codespace route.Create index.html and paste the code
In the file explorer on the left, press new file (+), name it exactly
index.html, and paste the code ChatGPT generated: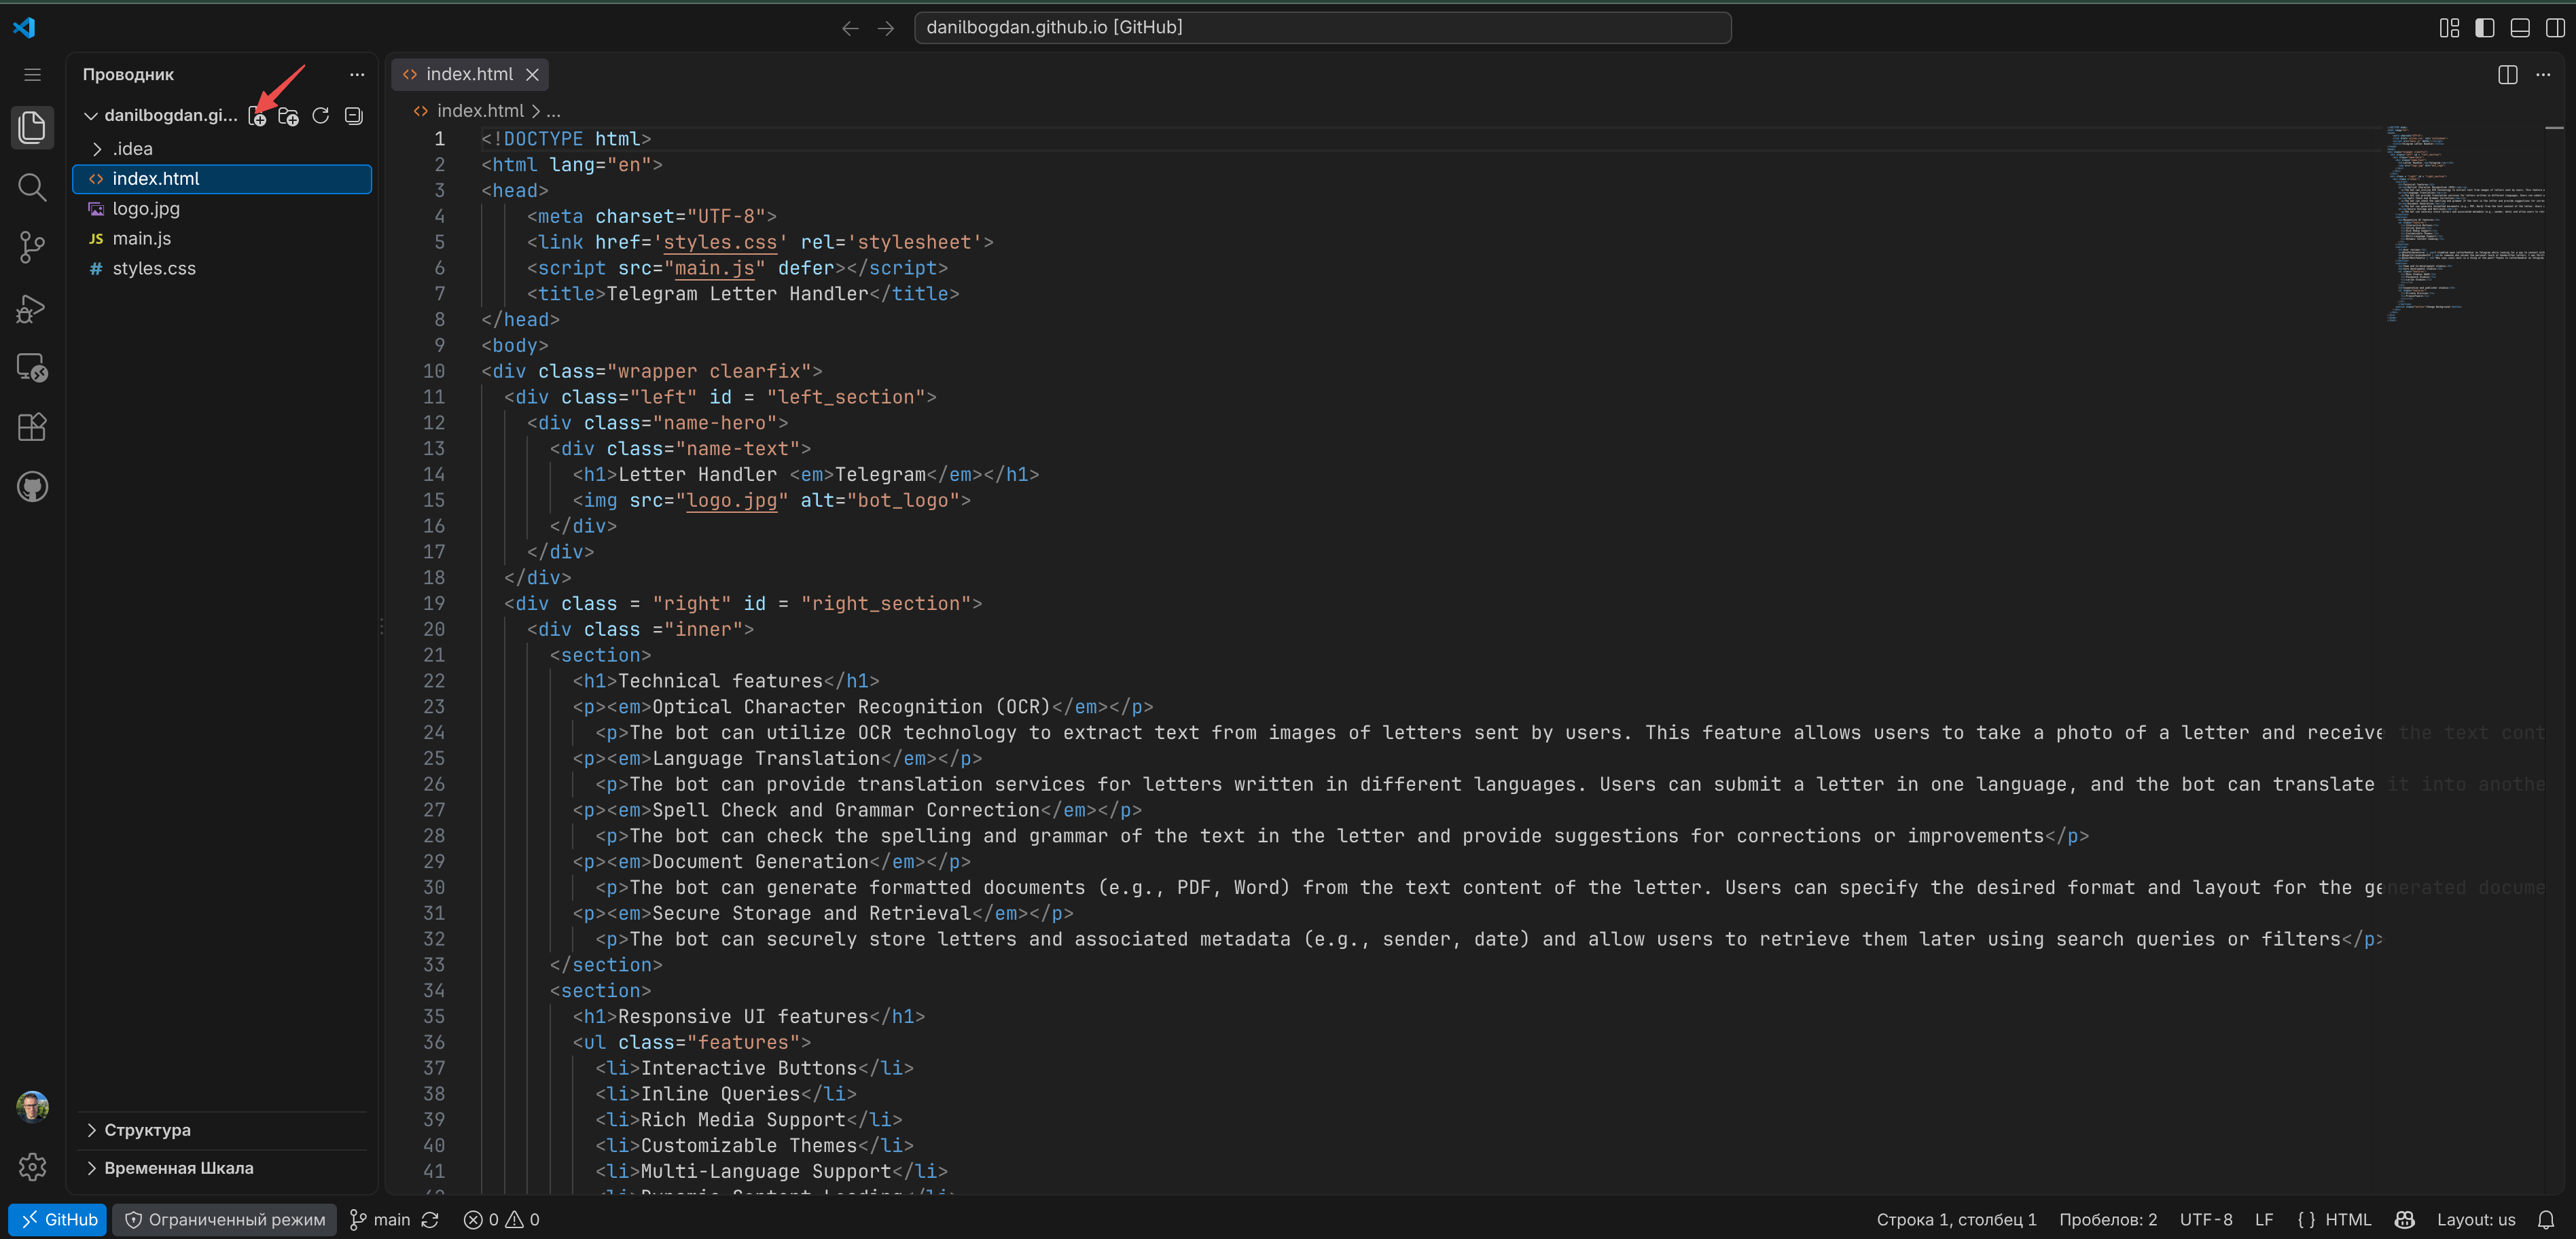
Pasting the ChatGPT code into index.html Commit and sync
Open the Source Control tab (the branch icon on the left), write a message for the change history (e.g. “My first website”) and press Commit. Then press Sync Changes at the bottom and confirm. In a freshly created repository the same button may read Publish Branch — that is the same action here, press it.
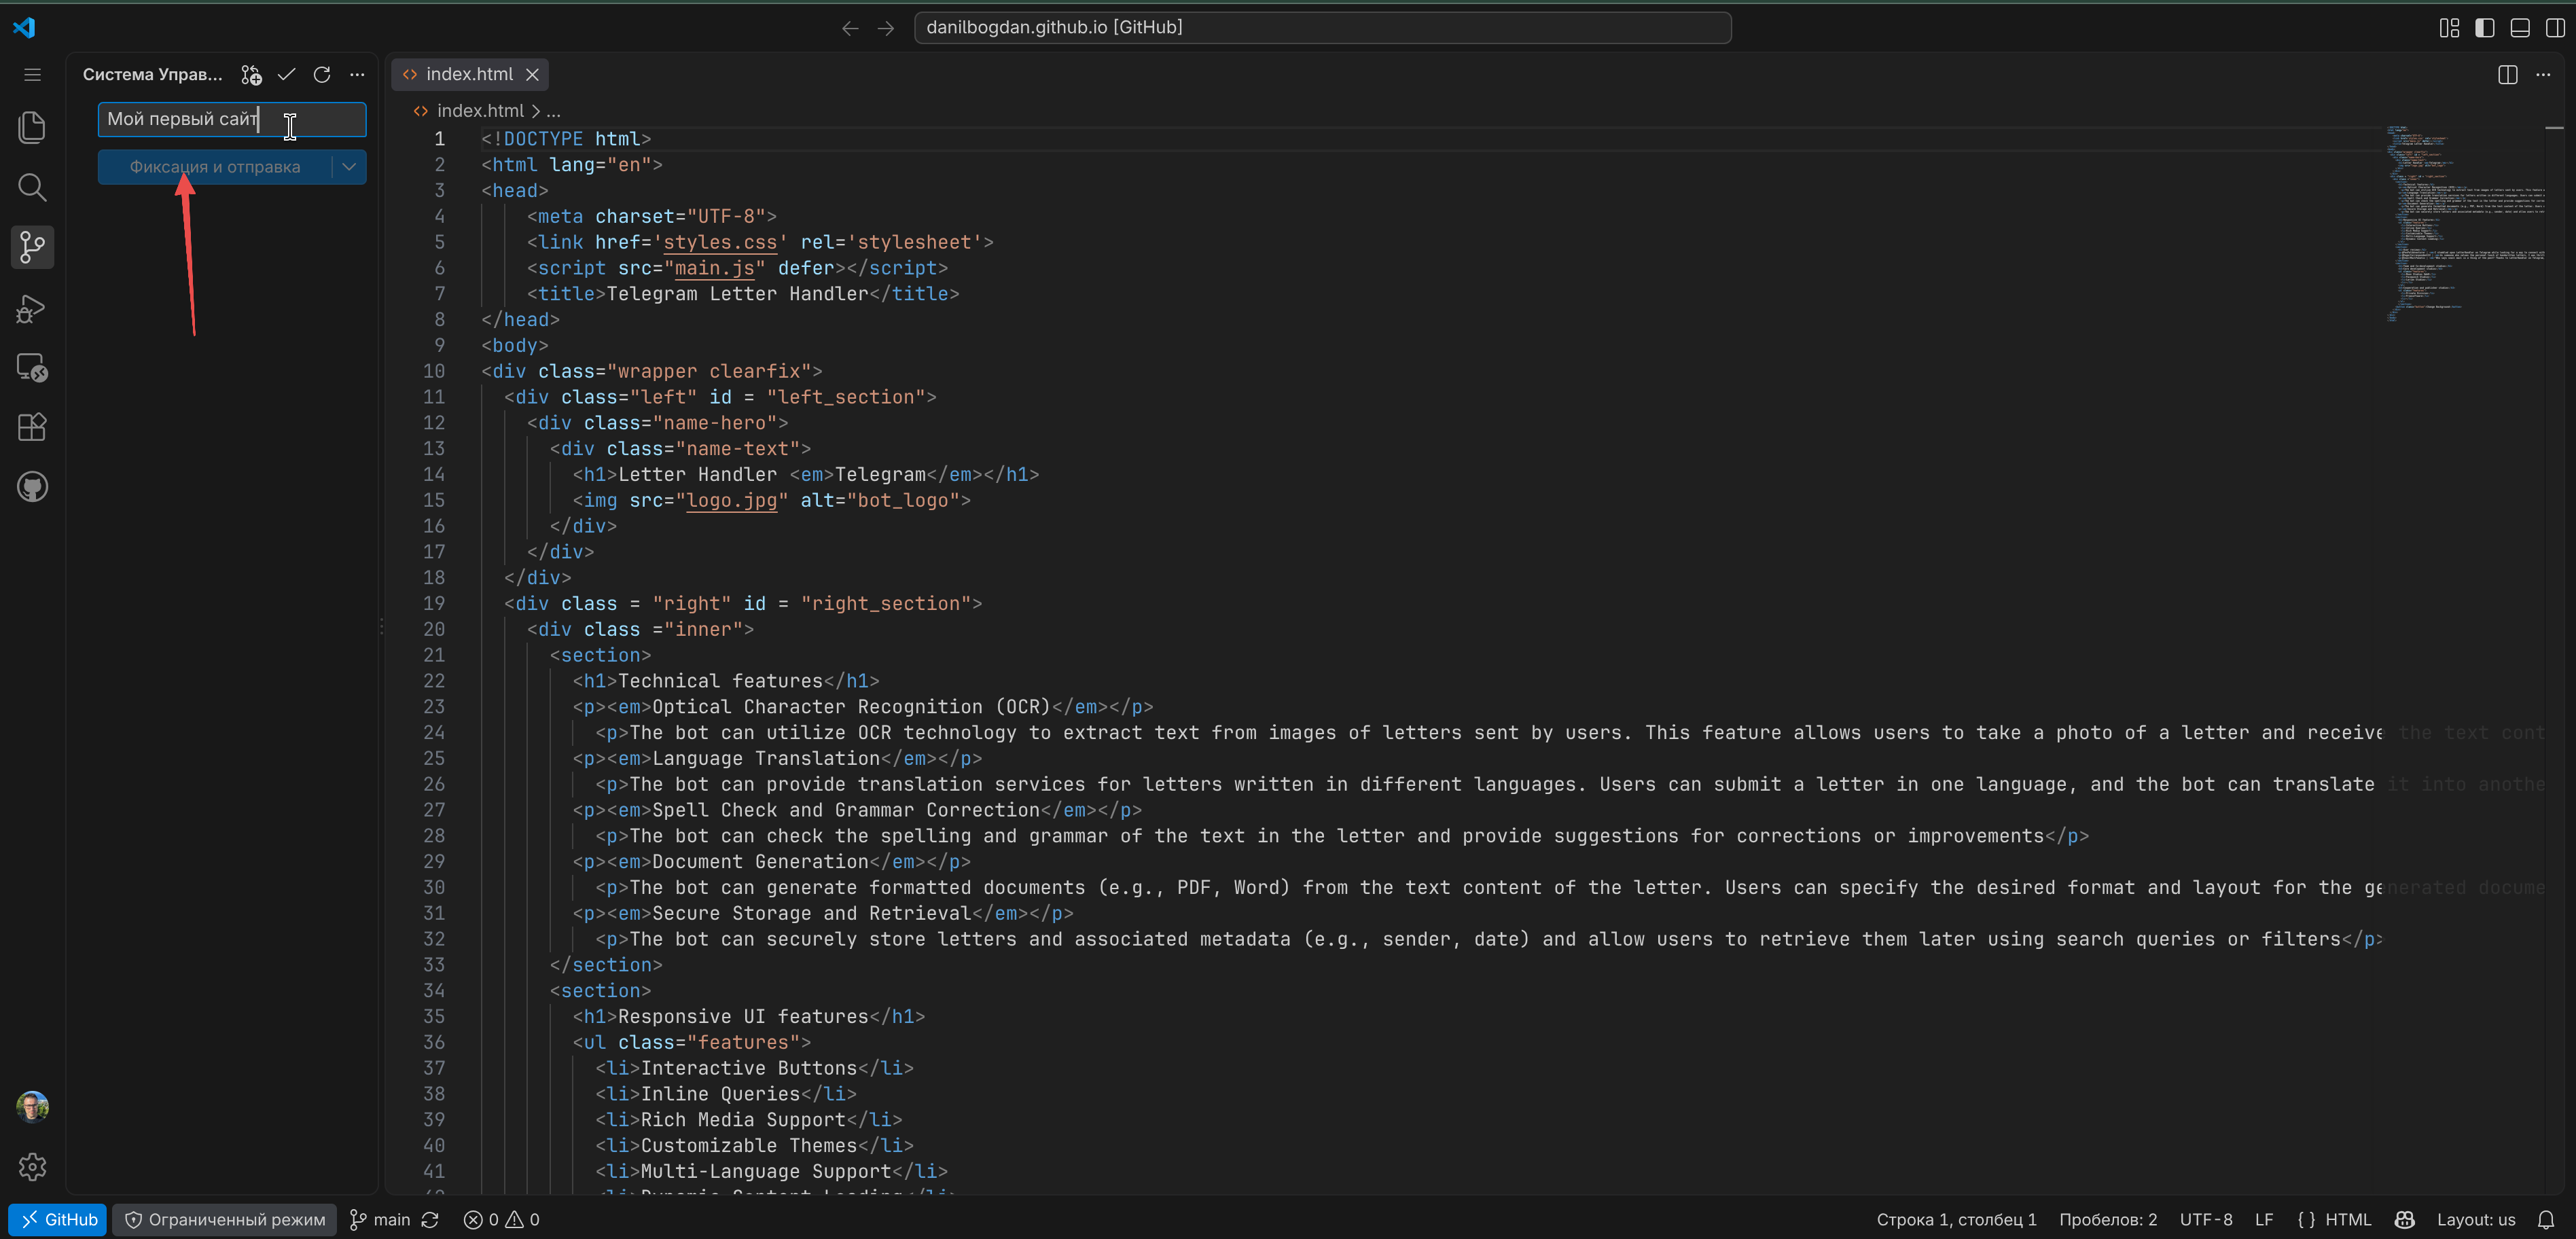
Commit, then Sync — the code goes to GitHub Wait a couple of minutes — done!
GitHub Pages deploys your site in 1–2 minutes. Open
https://your_login.github.io— your site is already on the internet 🎉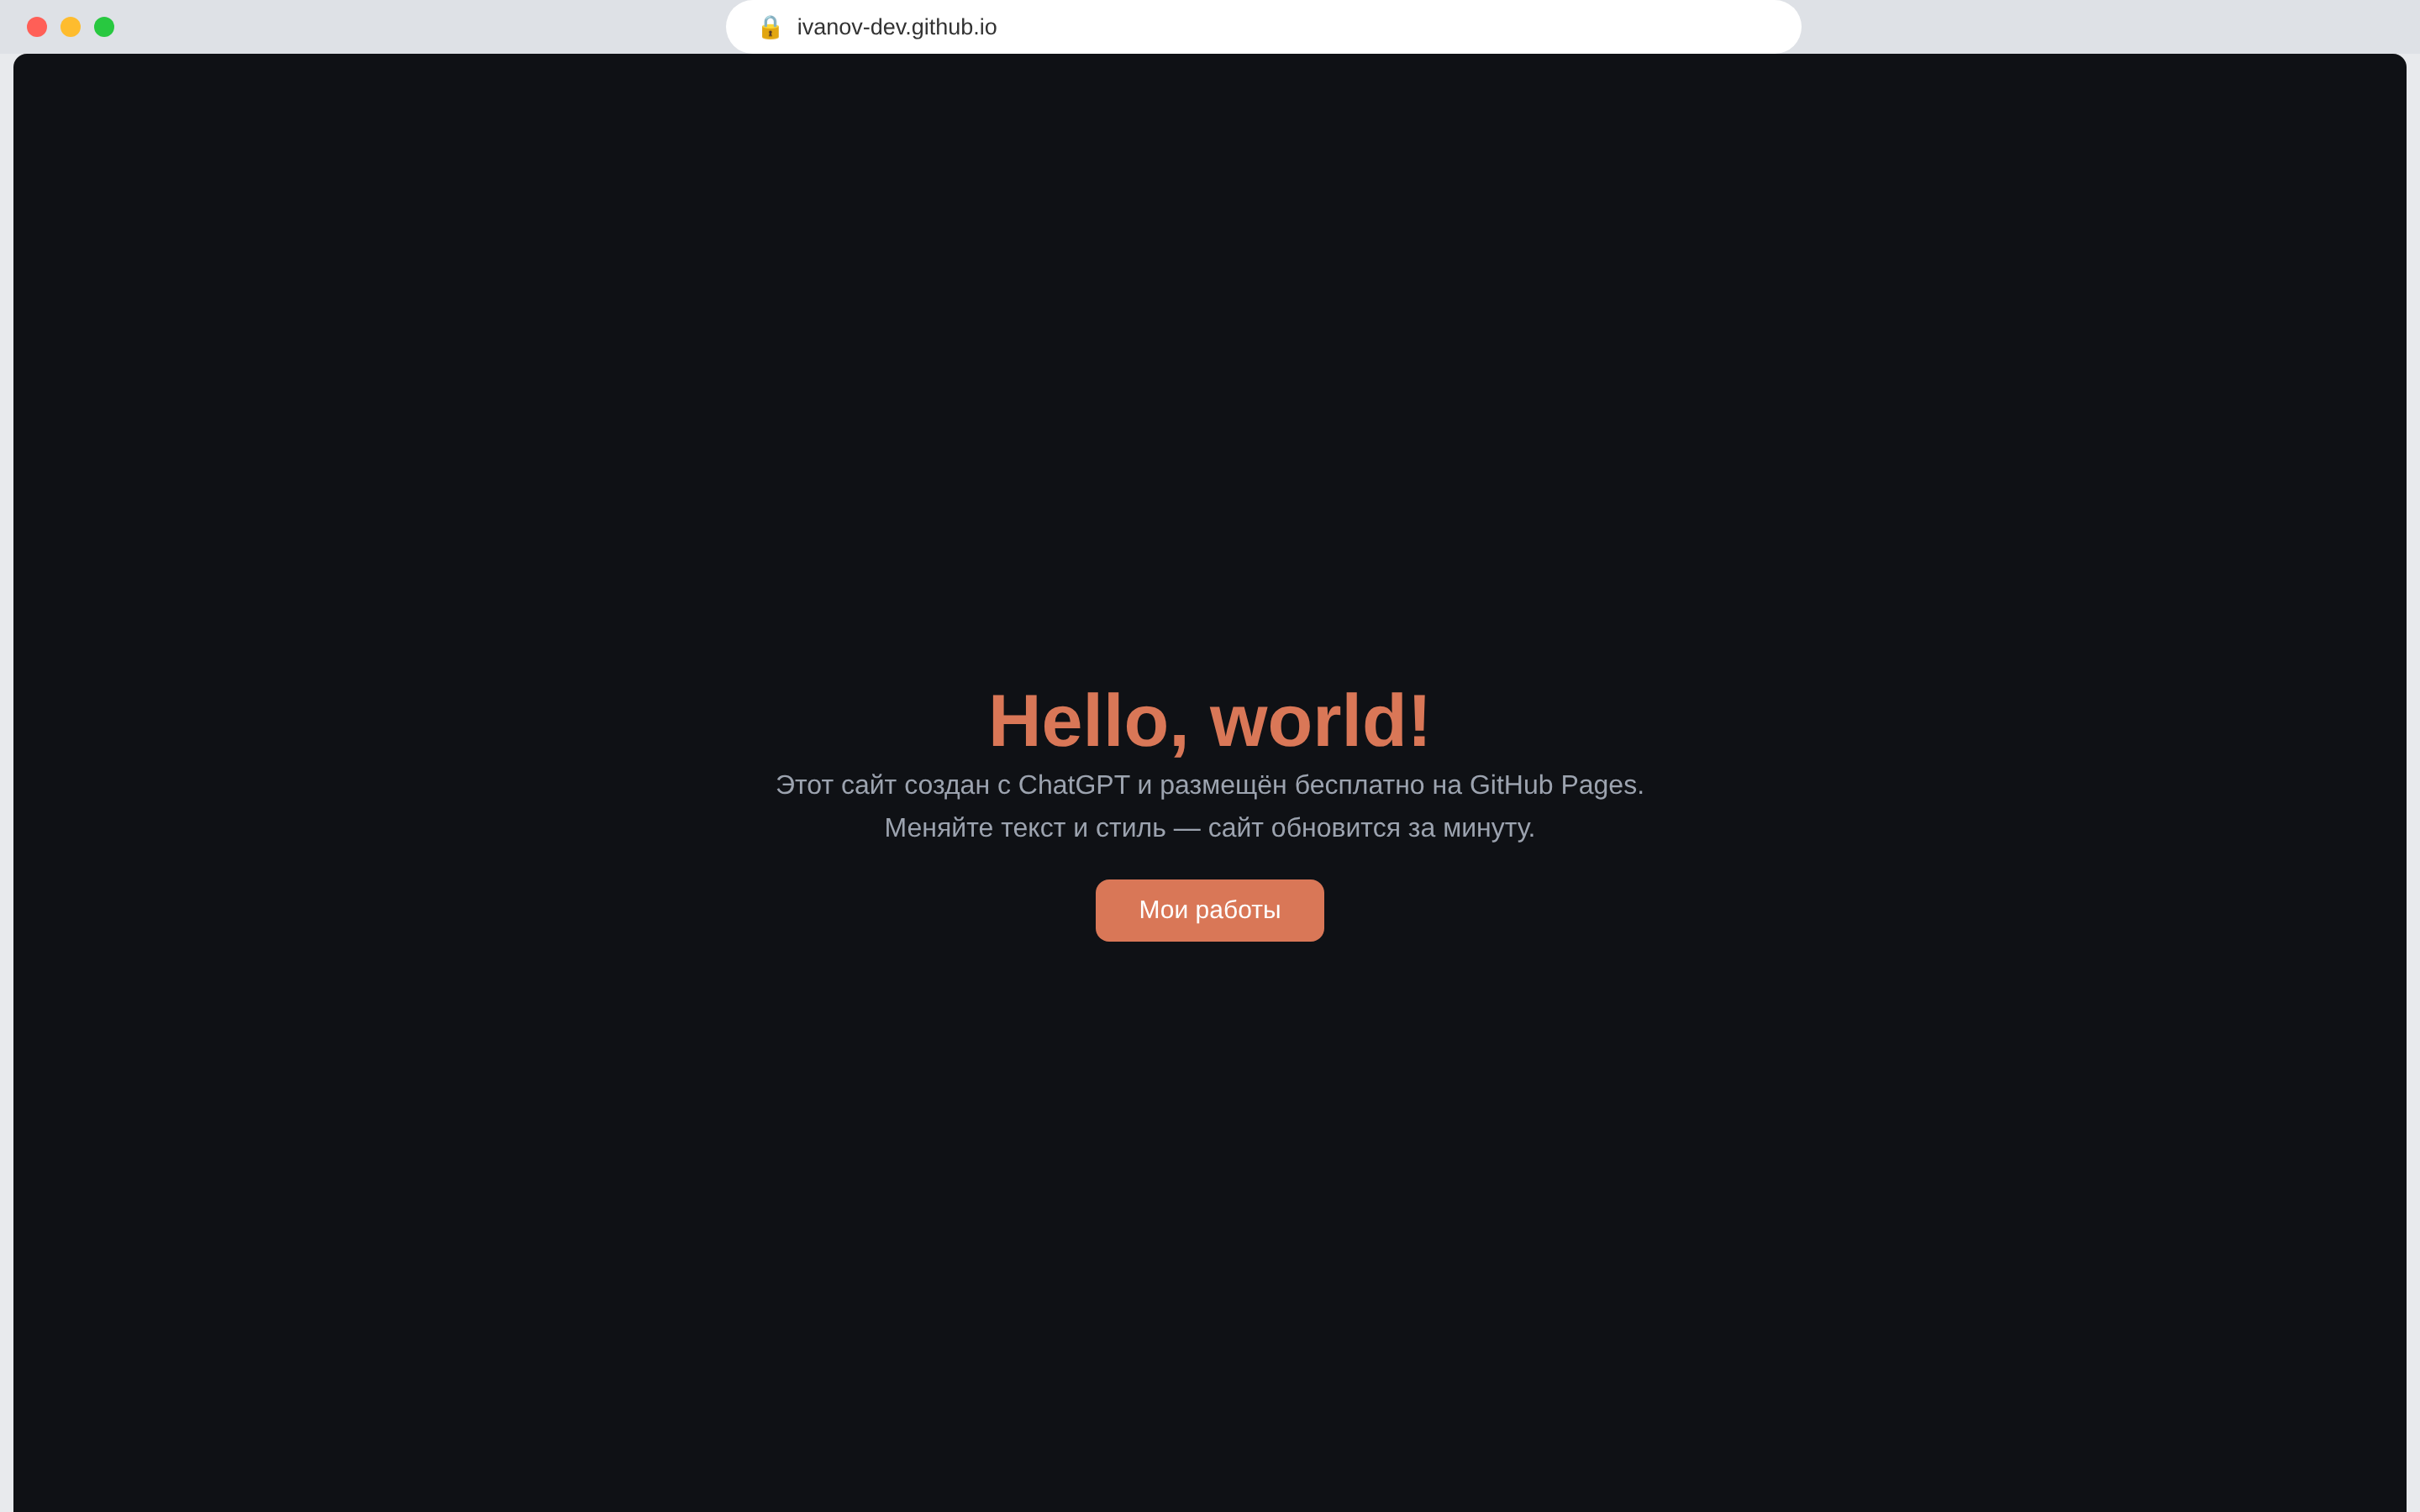
That's it — a published page at its own address. This screenshot's example account is ivanov-dev; yours will show your own username. Still nothing after five minutes?
On some accounts Pages has to be switched on once by hand: open Settings → Pages, under Build and deployment choose Deploy from a branch, then pick the main branch and the / (root) folder and press Save. Give it another minute and refresh the page.
Improve it as much as you like
Ask ChatGPT: “make the header sticky”, “add a gallery with a hover effect”, “change the colors to blue”. Each time, ask for the whole file again and repeat steps 6–7 — the site updates in about a minute.
About the screenshots
The GitHub and ChatGPT interfaces change from time to time — buttons may be named slightly differently, but the order of steps hasn’t changed in years. The screenshots also show a different example project from the one you’ll build, and some were taken with the interface set to another language, so don’t worry if labels don’t match yours. Follow the shape, not the words.
Common mistakes
- The file isn’t named
index.html— e.g.Index.htmlormain.html. GitHub Pages looks for exactlyindex.html, in lowercase. - You pasted a snippet instead of the whole file — the page renders half-empty or not at all. Ask ChatGPT for the complete file again.
- The repository doesn’t follow the pattern —
login-github-ioormysite.github.iowon’t work. You need the exact format:login.github.io, whereloginis your own GitHub username. - The repository was created as Private — GitHub Pages is free only for public repositories. Check it in Settings → General → Danger Zone → Change repository visibility.
- You never confirmed your GitHub email — the site silently refuses to publish. Check your inbox for the confirmation link.
- Forgot to Sync — a Commit without Sync keeps the changes only on your machine.
- Checking immediately — deployment takes 1–2 minutes. Refresh the page a bit later.
What’s next?
Once the basic site works, you can: connect your own domain, add a blog page, ask ChatGPT for a dark/light theme with a toggle — just ask it for the whole file again each time and repeat steps 6–7.
Two useful next stops: Your first coding agent builds pages like this from your own computer, and Git for vibe coders explains the undo button behind Commit and Sync. More step-by-step guides like this one live in the Learn section, and new material shows up in the blog.
Your GitHub username is ivanov-dev. What must the repository be called for the site to live at https://ivanov-dev.github.io?
You pasted the code and waited five minutes, but the page is blank. Which is NOT a likely cause?
Why must the repository be Public rather than Private?
Questions?
If something didn’t work or you have questions — join the Telegram channel.